Say you are standing in the dairy aisle, staring at a quart of milk and a small tub of plain yogurt, trying to work out whether your slow cooker can turn one into the other overnight. You have read that it can, you have seen the jars of thick white yogurt in other people’s photos, and you are not entirely sure where the heat comes in, how long any of it takes, or why some batches come out watery and some come out like set custard.
The short answer is that a slow cooker makes a serviceable yogurt incubator because it holds a low, steady temperature for hours — which is exactly what the bacteria need. The long answer involves milk choice, starter choice, temperature windows, and a few failure modes worth knowing before your first batch. Here are the questions most beginners ask, answered in the order they tend to come up.
Why does a slow cooker work for yogurt at all?
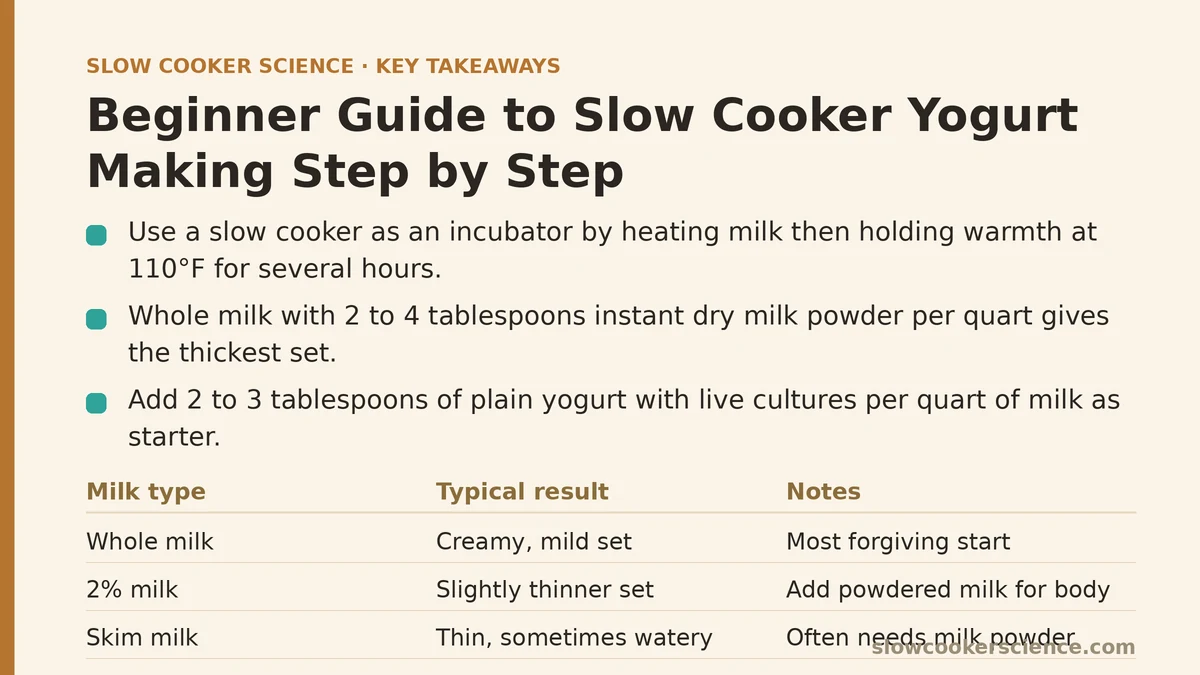
Yogurt forms when two families of bacteria — commonly Lactobacillus bulgaricus and Streptococcus thermophilus — digest the sugar in milk and produce lactic acid. That acid thickens the milk proteins into a gel. The bacteria are happiest somewhere around 110°F (43°C), and they need that temperature held for several hours.
A slow cooker on its Warm setting often sits in the 140–165°F range, which is too hot and will kill the culture. On Low it usually runs hotter still. What makes a slow cooker useful is not its cooking settings but its insulation: once you bring milk up to temperature and let it cool into the right window, the ceramic insert holds warmth for a long time. Many cooks use the cooker only to heat the milk, then wrap the insert in towels or leave it in the unplugged (or briefly warmed) housing to incubate. Others use a sous-vide circulator, a yogurt maker, or an oven with a pilot light for that stage instead.
Which milk should I use?
The milk decides how thick the result will be, more than any technique step does.
| Milk type | Protein & fat | Typical result | Notes |
|---|---|---|---|
| Whole milk (3.25% fat) | High fat, moderate protein | Creamy, mild set | Most forgiving starting point |
| 2% milk | Lower fat, moderate protein | Slightly thinner set | Works well; add powdered milk for body |
| Skim milk | Almost no fat | Thin, sometimes watery | Often needs milk powder or gelatin |
| Ultra-pasteurized | Proteins partly denatured | Can set weakly | Some brands work fine, some do not |
| Raw milk | Variable | Unpredictable | Food-safety risk; not recommended for beginners |
| Plant milks (soy, oat, almond) | Varies widely | Often thin or fails | Soy works best; needs added sugar and a plant-friendly culture |
If you are just starting, whole milk gives you the most margin for error. A common trick for a thicker result regardless of milk type is to stir in two to four tablespoons of instant dry milk powder per quart before heating — it adds protein, which is what sets into the gel.
How much starter do I need, and what counts as a starter?
A starter is simply yogurt with live cultures in it. You add a few spoonfuls to warm milk, and those bacteria multiply and acidify the whole batch. Two to three tablespoons of plain, unflavored yogurt per quart of milk is a typical dose.
Two things matter about the starter more than the brand:
- It must be alive. Yogurt that has been pasteurized after fermentation, or that has “heat-treated after culturing” on the label, has no working bacteria left and will not culture anything.
- It should be plain. Flavored, sweetened, or fruit-bottom yogurt introduces sugar and additives that can throw off the set and give you odd flavors.
You can also buy freeze-dried yogurt cultures marketed for home use. They are more consistent batch to batch and do not depend on whatever is in your fridge, but they cost more per batch. Many home cooks start with a store-bought plain yogurt and then keep two tablespoons of their own successful batch as the starter for the next one.
Walk me through the basic process step by step.
The sequence below is the standard one for a slow cooker with Low, High, and Warm settings, and it works for a 2-quart or larger insert.
- Pour in the milk. One quart (about 4 cups) is a good first batch. Pour it into a clean insert.
- Heat on Low until it reaches about 180°F (82°C). This takes roughly 2 to 3 hours in most slow cookers and varies a lot by model. Use an instant-read thermometer rather than a timer. Heating to 180°F denatures the whey proteins, which helps the yogurt set thicker.
- Cool to about 110°F (43°C). Turn the cooker off and either leave the lid off or set the insert on a rack to speed cooling. This usually takes 45 minutes to 2 hours. If you overshoot and it drops below 100°F, gently reheat to 110°F.
- Whisk in the starter. Put 2 to 3 tablespoons of plain live yogurt in a small bowl, add a ladle of the warm milk, stir until smooth, then pour that back into the insert. Stirring the starter into a small amount of milk first avoids clumps.
- Hold at 110°F for 6 to 12 hours. This is the incubation. Cover the insert and keep it warm — wrapped in two towels inside a cooler, in an oven with the light on, or by cycling the slow cooker on Warm for 10 minutes roughly every hour. The longer it goes, the tangier it gets.
- Chill. Once the yogurt has set into a soft gel and pulls slightly away from the sides when you tilt the insert, move it to the refrigerator for at least 4 hours. It firms up considerably as it cools.
How do I hold 110°F without a yogurt maker?
This is the part beginners struggle with most, and there are three realistic approaches:
- Towels and a cooler. Heat the milk in the slow cooker, cool it, stir in the starter, then put the covered insert into an insulated cooler packed with towels. It will drift down slowly over 8 to 12 hours but usually stays in the workable range. Cheapest, least fussy, least precise.
- Oven with the light on. Many ovens sit around 100–115°F with just the interior bulb on. Test yours with a thermometer first. Reliable if your oven is well insulated; risky if the light is too strong or the door leaks heat.
- Slow cooker on Warm, cycled. Some models have a Warm setting that stays near 140°F, which is too hot for the culture. Do not leave it on Warm throughout. Instead, switch it on for 10 minutes every hour or so to bump the temperature back up, and check with a thermometer. This works but needs more attention than the towel method.
- Sous-vide circulator. If you already own one, it hits 110°F exactly and holds it for hours. It removes the guesswork entirely and is the closest thing to a set-and-forget option.
How long should it incubate, and how do I know it is done?
Six hours yields a mild, barely tart yogurt. Eight hours is a middle ground most people like. Twelve hours or more produces a distinctly sour, thicker result, closer to Greek-style. There is no single right number — it is a taste preference, and it shifts with the culture and the room temperature.
Signs the batch is ready:
- The surface looks set, like a loose custard, rather than liquid.
- A spoon drawn through leaves a soft channel that holds its shape.
- The aroma is clean and tangy, not sharp or yeasty.
If it has been 12 hours and the milk still looks like milk, the culture did not take. Chill it anyway, then troubleshoot — the usual causes are starter that was not alive, milk that was too hot when the starter went in, or incubation temperature that drifted too low.
What if my yogurt comes out thin or watery?
Thin yogurt is the most common beginner complaint, and it almost always traces to one of these:
- Not enough protein. Skim milk and some plant milks simply do not have enough protein to form a firm gel. Fix: add 2–4 tablespoons of instant dry milk powder per quart, or use whole milk.
- Insufficient heating. If the milk never reached 180°F, the whey proteins stay folded up and do not help thicken the set. Fix: heat to 180°F and confirm with a thermometer.
- Short incubation. Six hours of a slow culture gives a loose set. Fix: go longer next time.
- Starter was weak or dead. Fix: use a fresh tub of plain yogurt or a new packet of culture.
If you want a Greek-style texture, strain finished yogurt through a fine-mesh sieve or a coffee filter lined with cheesecloth for 2 to 6 hours in the fridge. The liquid that drips off is whey, and it is useful in smoothies and bread dough.
Any food-safety basics I should not skip?
Yes, and they matter more here than in most slow cooker recipes because you are deliberately growing bacteria in warm milk.
- Start with clean equipment. Wash the insert, lid, spoon, and thermometer probe with hot soapy water, and rinse well. Any residue can harbor unwanted organisms.
- Do not leave the batch at incubation temperature longer than needed. Twelve hours is a normal upper limit. Longer incubation at warm temperatures increases the risk of off-flavors and unwanted microbes.
- Refrigerate promptly once set. Yogurt should go into the fridge as soon as incubation ends, and it keeps for about 1 to 2 weeks there.
- Watch for spoilage signs. Pink, orange, or fuzzy growth, a fizzy or yeasty smell, or a slimy texture all mean the batch should be discarded. Do not taste it to check.
- Do not use raw milk for a first attempt. Pasteurized milk is the safer and more predictable choice, especially while you are learning the process.
Can I reuse my own yogurt as starter forever?
You can, but the culture drifts over time. Each generation selects for slightly different bacteria, and after several rounds the yogurt can become thinner, more sour, or slower to set. A common practice is to use your own yogurt as starter for three to five batches, then buy a fresh tub of plain yogurt and reset. Some people also freeze a few tablespoons of a good batch in an ice cube tray to use as a future starter, which helps keep the culture closer to its original character.
How does this compare to just buying yogurt?
It depends on what you value.
- Cost. A quart of homemade yogurt costs roughly the price of a quart of milk plus a few cents of starter. Store-bought is typically two to four times that per quart.
- Control. You choose the milk, the tang level, the thickness, and whether anything is added. You cannot adjust any of those in a commercial tub.
- Time investment. Active time is maybe 15 minutes total, but the process spans 12 to 16 hours including heating, cooling, incubation, and chilling. It is not fast; it is unattended.
- Consistency. Store-bought yogurt is uniform batch to batch. Homemade varies with your milk, your culture, and your kitchen temperature, and a failed batch is always possible.
For a hobbyist who enjoys the process, the trade is usually worth it. If you need the same result every week without thinking about it, a yogurt maker with a dedicated thermostat removes most of the variables — but it also removes most of the craft.
A short checklist before your first batch
- Whole milk, or 2% with 2–4 tablespoons of dry milk powder added
- 2–3 tablespoons plain yogurt with live cultures, or a freeze-dried starter
- Clean insert, lid, spoon, and an instant-read thermometer
- A plan for the incubation hold — towels and cooler, oven with light, or a circulator
- Patience for the cooling step, which takes longer than most beginners expect
- Fridge space for the finished jar
The first batch is the one that teaches you your own slow cooker’s quirks — how long it takes to reach 180°F, how slowly it cools, and how much heat it holds once covered. Once you have those numbers, the second batch takes half the attention. If you want to go deeper on the incubation side, a circulator or a yogurt maker removes the guesswork, while the towel-and-cooler method keeps the whole thing low-tech and still works well enough for most kitchens.