A slow cooker is a countertop appliance that holds food between 170°F and 280°F for several hours, using trapped steam and gentle heat to break down connective tissue and blend flavors without active stirring. That sealed environment changes how every ingredient behaves, which is why a first attempt often produces something edible but underwhelming — the classic “everything tastes the same” pot. The fix is rarely the recipe. It’s understanding the machine’s three quirks: heat comes from the sides, moisture never escapes, and temperature builds slowly. Get those three straight and your first meal can match what blogs promise.
Below is a checklist that walks you from unboxing to serving, with the most common beginner failures mapped to their causes and fixes along the way.
Before You Plug It In: The Setup Checklist
☐ Check the insert for chips and cracks
Run your hand along the entire ceramic insert, inside and out, before you wash it. Hairline cracks are hard to spot with eyes alone — your fingertips will catch them. A cracked insert can shatter mid-cook when thermal expansion meets a weak point. If you find one, contact the manufacturer; this is a warranty issue, not a cooking problem.
☐ Wash the insert and lid with soapy water
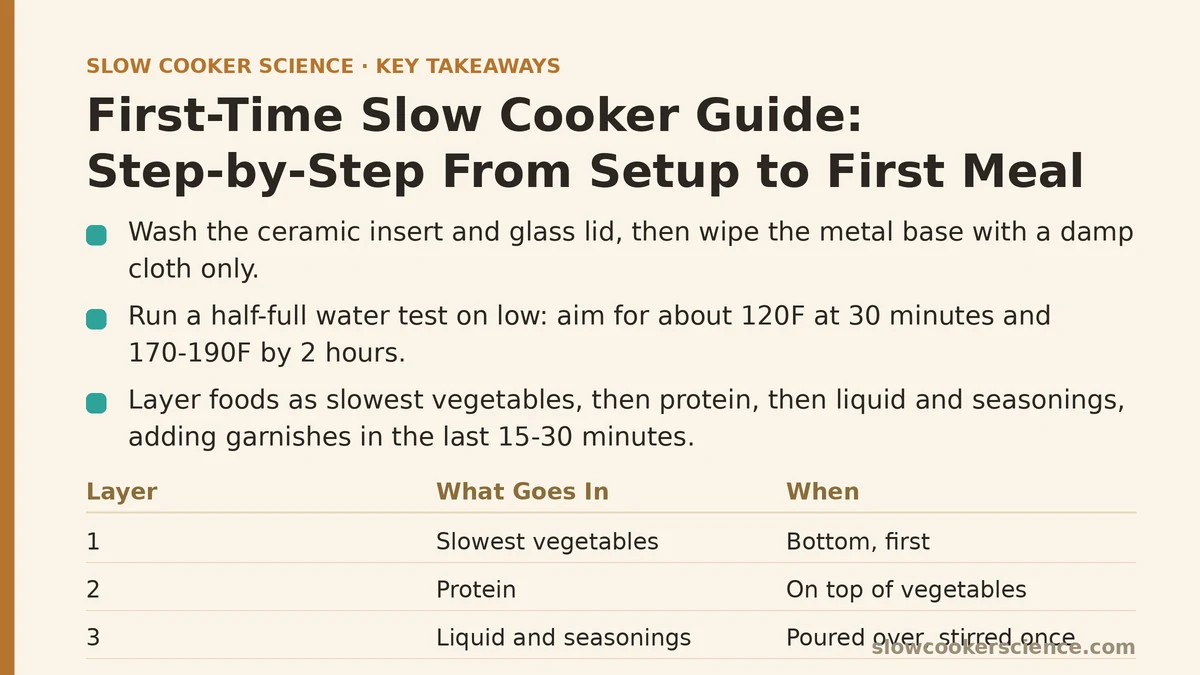
New inserts often carry manufacturing residue and dust from the box. Wash both the ceramic insert and the glass lid with warm, soapy water, rinse thoroughly, and dry completely. Do not submerge the metal base — wipe it with a damp cloth only.
☐ Run a water test to confirm the heat distribution
Fill the insert halfway with water, set the cooker to low, and cover it. Check the water temperature after 30 minutes and then again at the 2-hour mark. In practice, you want to see a steady climb — roughly 120°F at 30 minutes and 170–190°F by 2 hours. If the water boils aggressively or stays lukewarm, your unit is running hot or cold. This matters because slow cooker temperature ranges vary by brand, and knowing your machine’s baseline saves you from guessing later.
☐ Locate the hot zones
While the water test runs, touch the outside of the insert every 15 minutes. You’ll likely find the sides near the heating element feel warmer than the center bottom. That’s normal — heat radiates from the sides. You’ll work around this by stirring once or twice mid-cook, which is covered below.
Your First Cook: The 4-Layer Rule
For a first meal, skip recipes with more than six ingredients and pick something braise-style — chicken thighs with onions, carrots, and broth, or a beef chuck stew. You want one protein, two or three vegetables, one liquid, and one seasoning layer. Here’s the order everything goes in:
Layer 1 — The slowest vegetables (bottom): onions, carrots, celery, potatoes, root vegetables. These take the longest to soften and sit closest to the heat source.
Layer 2 — The protein: meat goes on top of the vegetables, not directly on the insert floor. This prevents the bottom of the meat from overcooking and sticking while the top is still raw.
Layer 3 — The liquid and seasonings: broth, canned tomatoes, wine, dried herbs, ground spices. Pour over the protein and vegetables, then stir once to distribute the seasoning. Do not stir again for at least 2 hours — the temperature needs to build steadily through the mass.
Layer 4 — The garnish (added late): fresh herbs, lemon juice, yogurt, or any dairy-based swirl. These go in during the last 15–30 minutes, because prolonged heat destroys their bright flavors.
Common Beginner Failures: Symptom → Cause → Fix
Symptom: The food is dry or burnt on the edges
Cause: You cooked on high for too long, or you left the cooker on warm past the finish time. Many first-timers assume “low” means gentle and “high” means fast, then pick high to save time. In a sealed slow cooker, high heat runs 200°F to 280°F, which can dry out lean cuts and scorch the sides where the heating element wraps.
Fix: Use low for any cook longer than 6 hours. On high, check 2 hours before the recipe’s stated finish time — high cooks fast and unevenly. For lean proteins like chicken breast or pork loin, skip the high setting entirely and use low with a 4- to 5-hour window. If you catch the edges burning mid-cook, stir the pot immediately to redistribute the liquid, add ½ cup of hot broth, and switch to low for the rest of the cook.
Symptom: The liquid is thin and watery, or the dish tastes flat
Cause: You added liquid for a stovetop recipe, not a slow cooker one. Because a slow cooker traps steam, almost none of the liquid evaporates. The recipe’s “1 cup of broth to keep it from sticking” becomes 1 cup of broth swimming in the juices the meat and vegetables release on their own. The result tastes diluted.
Fix: Measure liquid reductions at the end, not the start. For a first cook, halve the liquid the recipe calls for. After 4 hours, check the pot — if it looks dry, add hot broth ¼ cup at a time. If it looks soupy, leave the lid off for 20–30 minutes at the end while the cooker is still on to let steam escape. Taste at the 6-hour mark, not before — flavors need at least that long to meld.
Symptom: The meat is tough, not falling apart
Cause: You picked the wrong cut, or you pulled it too early. Chicken breast and tenderloin get fibrous and dry in a slow cooker because they lack collagen and fat. Lean cuts need high, fast heat — a slow cooker gives them the opposite. Tougher cuts like chuck, brisket, and thigh meat need low, slow heat to break down collagen into gelatin, which is what makes meat fork-tender.
Fix: For your first meal, use boneless, skinless chicken thighs — they have enough fat to stay moist even on a 7-hour low cook. For beef, choose chuck roast or brisket. To test doneness, insert a fork into the thickest piece: if it twists easily with gentle pressure, it’s done. If it resists, give it 45 more minutes and retest. Every hour you add past the 6-hour mark on low builds tenderness — this is the one case where longer beats the clock.
The Mid-Cook Check: What to Look For at Hour 2 and Hour 4
At the 2-hour mark, lift the lid once — no more — and give everything a single, gentle stir from the bottom up. This redistributes heat and prevents the edge near the heating element from getting crusty. Do not leave the lid off longer than 15 seconds; each lid lift adds roughly 20–30 minutes to the cook time.
At the 4-hour mark, check three things:
- Liquid level: The meat should be half-submerged. If it’s fully submerged, that’s fine; if it’s dry on top, add ½ cup hot broth.
- Aroma: You should smell the seasonings without sticking your nose in the pot. If the smell is faint, taste the liquid — it’s likely just diluted, not unseasoned. Add salt and dried spices now, not at the start.
- Steam activity: Look at the lid between the vent and the glass. A steady, gentle condensation line means the cooker is holding temperature. If there’s no condensation at all past the 1-hour mark, your machine may be running cold — bump up to high for the next hour and recheck.
First-Meal Recipe: Chicken and Vegetable Stew for the Absolute Beginner
This is a forgiving first recipe with built-in failure margins. Total prep time is 15 minutes.
| Ingredient | Amount |
|---|---|
| Boneless, skinless chicken thighs | 1.5 lbs, cut into 2-inch pieces |
| Yellow onion | 1 medium, roughly chopped |
| Carrots | 3, cut into ½-inch rounds |
| Celery | 2 stalks, sliced |
| Yukon Gold potatoes | 3 medium, cut into 1-inch chunks |
| Chicken broth | 1 cup, not more |
| Dried thyme | 1 tsp |
| Smoked paprika | 1 tsp |
| Salt | ½ tsp |
| Black pepper | ½ tsp |
| Fresh parsley | ¼ cup chopped, added at the very end |
Setup: Layer the vegetables (onion, carrots, celery, potatoes) on the bottom. Place the chicken thighs on top. Pour the broth over, then sprinkle the thyme, paprika, salt, and pepper over everything. Do not stir.
Cook: Cover and set to low for 6 hours. At hour 2, stir once gently. At hour 4, check liquid and aroma using the checklist above. At hour 5, use a fork to test a chicken piece — if it yields easily, the stew is nearly done.
Finish: Stir in the fresh parsley 15 minutes before serving. Taste the broth — if it needs more salt, add it now. Let the stew sit uncovered for 5 minutes before serving so the liquid settles; this helps the broth cling to the chicken and vegetables rather than pooling at the bottom.
Troubleshooting Table: Quick Reference for Your Next Three Cooks
If you’re a first-timer, this table condenses the checklist into a glanceable form:
| What went wrong | Likely cause | Immediate fix |
|---|---|---|
| Dry edges or burnt sides | Cooking on high too long | Stir, add ½ cup hot broth, switch to low |
| Watery, flat-tasting liquid | Too much liquid at the start | Remove lid for 20 min at the end; taste and season late |
| Tough, stringy meat | Lean cut + too short a cook | Use thigh or chuck; retest with a fork every 30 min |
| No steam on the lid | Machine runs cool | Switch to high for 1 hour, then return to low |
| Constant overfill spillover | Too much liquid or insert too full | Remove 1 cup of liquid; keep fill below the ¾ mark |
| Everything tastes the same | No mid-cook seasoning check | Add acid (lemon juice or vinegar) and fresh herbs at the end |
Beyond the First Meal: Two Adjustments That Change Everything
After two or three successful low cooks, make these two changes to expand what you can make:
1. Brown the meat before adding it. A 10-minute sear in a hot pan builds a crust that the slow cooker can’t create on its own. This adds depth that converts a good stew into a great one. The slow cooker’s sealed environment can never produce Maillard browning — the browned bits must arrive pre-made.
2. Halve the liquid in any recipe you find online. Most recipe writers test in 6-quart cookers with stovetop habits baked in. In your own machine, start at half the stated liquid and add more only if the pot looks dry at hour 4. This rule alone prevents the most common beginner complaint — bland, watery food.
The One Habit That Prevents Most Problems
Write down what you did: which cut of meat, which setting, how long it took, and what you’d change next time. A slow cooker’s quirks are unique to your unit and your kitchen’s ambient temperature. The first time you run a recipe, the clock is a suggestion. The second time, your notes beat any published timer. This habit turns every meal into data, and within four or five cooks, you’ll know your machine well enough to adjust any recipe on sight.
Slow cooking rewards patience, but it punishes assumptions. Confirm your machine’s temperature, layer ingredients by density, resist the urge to add extra liquid, and test doneness with a fork instead of a timer. That’s the entire framework — everything else is seasoning.
Related guides: Slow Cooker First-Timer Guide: From Unboxing to First Meal, How to Use a Slow Cooker for the First Time: A Beginner’s Guide, and Slow Cooker Energy Cost: How Much Does It Really Cost to Run.