Drop a recipe written for a 6-quart slow cooker into a 3-quart insert without adjusting anything else, and there’s a decent chance the dish finishes almost two hours early rather than late. That catches most people off guard, since the instinct is to assume a smaller pot with less food just needs more patience, when in fact a smaller mass of ingredients heats through faster and dries out sooner than the recipe’s timer accounts for.
The reverse problem shows up just as often. Scale a small-batch recipe up into an 8-quart cooker without touching the liquid, and the extra volume of meat and vegetables can shed enough of their own moisture that the dish turns out swimming in liquid nobody added on purpose. Slow cookers are marketed by capacity, but capacity alone tells you almost nothing about how a given recipe will behave once it’s moved from the appliance it was written for into the one actually sitting on your counter. What follows is a process you can rely on to make that move without ending up with a ruined dinner.
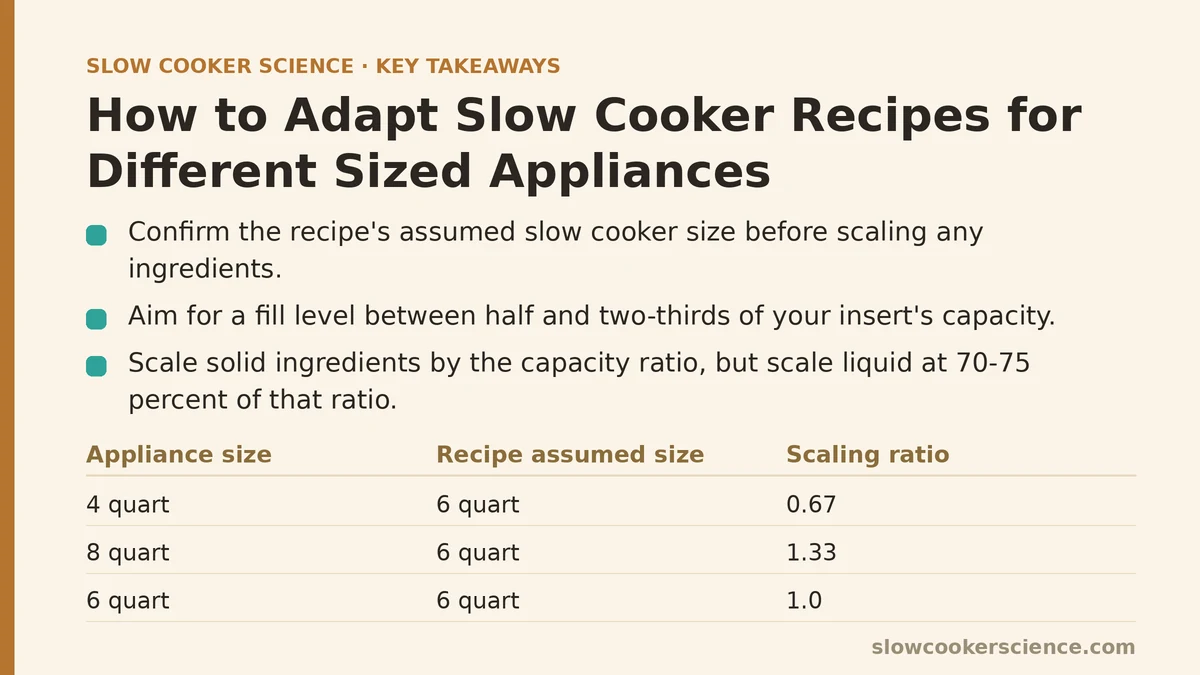
Step 1: Confirm the Recipe’s Assumed Size Before Touching the Ingredients
Most recipes never state which slow cooker size they were tested in, but you can usually infer it. A recipe listing 3 to 4 pounds of meat plus several cups of vegetables and liquid was almost certainly written for something in the 6-quart range, since that’s the most common size sold and tested against. A dip or small side dish calling for a pound of ingredients or less is probably a 1.5 to 3-quart recipe.
Write this assumed size down before you do any math. Every later step depends on comparing your actual appliance against this baseline, and skipping straight to scaling ingredients without pinning down the starting point is how conversions go sideways early.
Step 2: Check the Math on Fill Level, Not Just Capacity
Compare the recipe’s total volume of solid ingredients and liquid against your insert’s stated capacity, and aim to land somewhere between half full and two-thirds full. Underfilling by a wide margin means less thermal mass for the appliance to work through, which speeds up cooking in a way the original recipe’s timing doesn’t anticipate. Overfilling past roughly three-quarters risks uneven heating near the lid and liquid pushing up and out during the cook.
This step is worth doing before any ingredient scaling because it tells you whether you’re even in a workable range. A recipe built for a 6-quart cooker that would only fill a 10-quart insert to a quarter of its capacity isn’t a good candidate for scaling up at all — it’s a candidate for finding a different recipe closer to that size.
Step 3: Calculate a Scaling Ratio, Then Split It in Two
Divide your appliance’s capacity by the capacity the recipe assumes. A 6-quart recipe moved into a 4-quart cooker gives a ratio of about 0.67; moved into an 8-quart, the ratio is roughly 1.33.
Apply that ratio to solid ingredients — meat, vegetables, seasonings — directly. Liquid needs a separate, smaller ratio, usually around 70 to 75 percent of the solids ratio. Slow cookers trap moisture rather than letting it evaporate the way a stovetop pot does, so liquid that starts in the pot largely stays there. Scaling it at the same rate as the solids tends to leave a scaled-up recipe noticeably wetter than the original, and a scaled-down one slightly starved for liquid partway through.
Step 4: Reset Your Expectations for Cooking Time
Here’s where the surprising part from the opening comes back into play: cooking time does not track ingredient volume in a straight line. What determines how long a dish takes is how quickly heat penetrates to the center of the mass and brings the whole pot up to temperature, not the raw quantity of food inside it.
A smaller batch in a smaller cooker generally finishes meaningfully faster than the original recipe states, sometimes by an hour or more on a long low-heat cook. A larger batch in a larger cooker takes longer, but rarely in proportion to how much more food is in the pot. As a rough starting point:
- Scaling down to roughly 0.5–0.75 of the original recipe: subtract 45 to 90 minutes on low, or 20 to 40 minutes on high.
- Scaling up to roughly 1.5–2x the original recipe: add 45 to 90 minutes on low, or 20 to 40 minutes on high.
Treat these ranges as a starting point for your first attempt at a given conversion, not a fixed rule to lock in permanently.
Step 5: Let Temperature and Texture Overrule the Clock
Whatever adjusted time you land on in Step 4, verify it rather than trusting it blindly, especially the first time you run a converted recipe. Check meat with a thermometer or a fork for tenderness, and test vegetables for the texture you’re after. The math in the earlier steps gets you into a reasonable window; the appliance in front of you is what determines the precise moment the dish is done.
This matters more on a first attempt than on a repeat one. Once you’ve converted a given recipe successfully and taken note of how long it actually took, you can lean on that number the next time and rely less on the general estimate.
Step 6: Factor In the Shape of Your Insert, Not Just Its Volume
Two slow cookers listed at the same quart capacity can still cook differently if one insert is wide and shallow while the other is tall and narrow. A wide, shallow shape exposes more surface area to the lid and heating element, which tends to push cooking slightly faster and lets liquid reduce a bit more than a deep, narrow insert holding the same volume would.
If the appliance you’re converting into differs in shape as well as size from what the recipe assumes, start checking for doneness a little earlier than your Step 4 estimate suggests, and keep an eye on liquid levels partway through rather than only at the end.
Step 7: Recognize Which Recipes Resist Conversion Entirely
Some dishes don’t scale cleanly no matter how carefully you run the numbers. Anything built around a specific baking dish, casseroles with a defined layered structure, or recipes where a particular ratio of exposed surface to total volume matters for texture — think dishes meant to develop a slightly firm top or a reduced, syrupy edge — tend to behave unpredictably when the insert size changes substantially.
Stews, braises, chilis, and most single-pot meat-and-vegetable combinations are far more forgiving. If the recipe you’re trying to convert falls into the resistant category, it’s often faster to search for a version written closer to your actual appliance size than to force a scaling formula onto something that wasn’t designed to bend.
Putting the Steps Together
Say you have a recipe written for a 6-quart cooker: 3 pounds of pork shoulder, 3 cups of vegetables, 1.5 cups of broth, cooked 8 hours on low. Your appliance is a 3.5-quart insert.
Your scaling ratio comes out to about 0.58. Solids scale to roughly 1.75 pounds of pork and 1.75 cups of vegetables. Liquid, scaled at 75 percent of that ratio, comes to about 0.65 cups rather than the full 0.87 cups a straight scale-down would suggest, though rounding up slightly to 0.75 cups leaves a bit of margin. Cooking time drops into the range of 6.5 to 7 hours on low, confirmed with a fork check on the pork rather than pulled the instant the timer ends.
Here’s how that conversion breaks down step by step:
| Element | Original (6-qt recipe) | Scaled (3.5-qt cooker) |
|---|---|---|
| Meat | 3 lbs | ~1.75 lbs |
| Vegetables | 3 cups | ~1.75 cups |
| Liquid | 1.5 cups | ~0.75 cups |
| Cook time (low) | 8 hours | ~6.5–7 hours |
No conversion formula replaces the notes you build up after running the same recipe through your own machine a couple of times, but starting from a deliberate process — confirming the assumed size, splitting solids and liquid into separate ratios, adjusting time by mass rather than strict proportion, and checking doneness directly — gets a converted recipe far closer on the first attempt than halving or doubling everything by instinct ever does. Related guides: How to Layer Ingredients in a Slow Cooker for Even Cooking, Slow Cooker Chili Recipe Tips for Perfect Texture Every Time, and How to Convert Oven Recipes to Slow Cooker: A Reliable Method.