The most common misconception about slow cookers is that they’re forgiving enough to take chicken straight from the freezer to the pot with no consequences. The appliance does run at a low, steady heat for hours, and it’s tempting to assume that time alone guarantees safety. In practice, a slow cooker heating from cold with a solid block of frozen meat in the middle spends its first stretch of cooking in a danger zone, and the outer layers of the chicken can linger in bacteria-friendly temperatures for far longer than a thawed piece would.
That doesn’t make frozen-to-slow-cooker chicken impossible. It makes the method conditional, and worth understanding before you commit a weeknight dinner to it. What follows is a single walkthrough of a realistic scenario — a 6-quart cooker, two large boneless skinless breasts still frozen solid, and a recipe that needs to be on the table by evening — with the food-safety reasoning woven into each decision.
The Scenario: Two Frozen Breasts, One Slow Cooker, Six Hours Until Dinner
Picture a weeknight where the chicken never made it out of the freezer the night before. It’s mid-morning, and the plan is a shredded chicken dish for dinner. The breasts are large, roughly 10 to 12 ounces each, frozen into a single rigid block. The cooker is a standard 6-quart model.
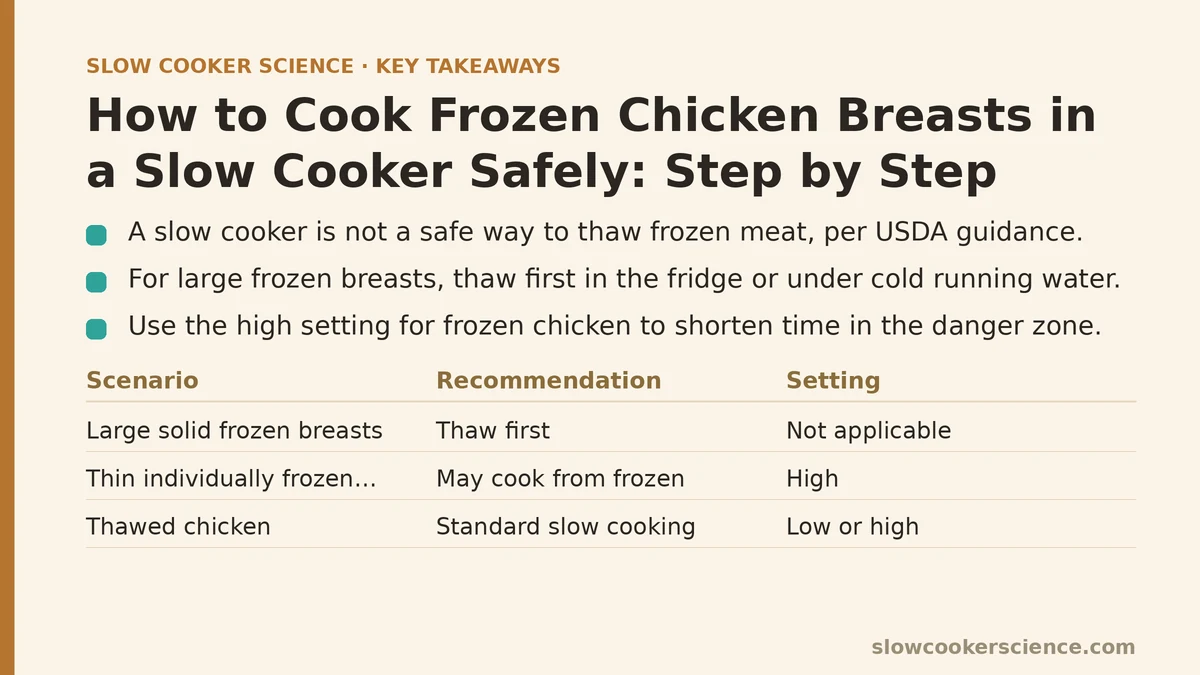
Before anything else, the honest answer to the question “can I just drop these in?” is: only under specific conditions, and the conditions are stricter than most recipes suggest. Chicken is a high-risk food for bacterial growth, and the USDA’s guidance is blunt — a slow cooker is not a safe way to thaw frozen meat. Cooking from frozen is a separate question from thawing, and it only becomes acceptable when the frozen item is small enough and the cooker is hot enough that the food passes through the danger zone (roughly 40°F to 140°F) quickly rather than lingering there.
That framing sets up the whole decision. If the breasts are large and rock-solid, the safer move is to thaw them first — in the refrigerator overnight, or in a sealed bag under cold running water if time is tight. If they’re thin, individually frozen cutlets, a slow cooker on high can sometimes push them through the danger zone fast enough to be defensible. The rest of this walkthrough assumes the large-breast case, because it’s the one where the margin for error matters most.
Why “Low and Slow” Is the Wrong Setting for Frozen Chicken
The instinct is to use the low setting, since low-and-slow is the whole identity of the appliance. For frozen chicken, that instinct backfires. On low, a 6-quart cooker typically takes one to two hours just to bring its contents up toward a simmer, and a solid frozen block in the center slows that climb further. During that window, the surface of the chicken and the surrounding liquid sit in the range where bacteria multiply fastest.
Setting the cooker to high compresses that warm-up. The heating element works harder, the liquid around the chicken reaches a safer temperature sooner, and the total time the food spends in the danger zone shrinks. The trade-off is texture: high heat for a shorter time can make lean breast meat firmer and more prone to drying out than a long low cook would. For frozen chicken, safety has to win that trade-off, and the texture loss is manageable if you pull the chicken as soon as it reaches temperature rather than letting it sit.
A quick comparison of the realistic options a home cook faces:
| Approach | Safety margin | Texture outcome | Best for |
|---|---|---|---|
| Frozen, high setting, small/thin pieces | Acceptable if pieces are thin and cooker preheats | Firmer, can dry at edges | Individually frozen cutlets, thin breasts |
| Frozen, low setting, large solid breasts | Poor — long danger-zone window | Unpredictable, often dry outside and underdone inside | Not recommended |
| Thawed first, then cooked on low | Best | Tender, even cook | Any size breast, planned ahead |
| Thawed first, then cooked on high | Good | Slightly firmer, faster | Weeknight time pressure |
The table makes the pattern clear: the more frozen mass and the lower the heat, the worse the safety margin. Thawing first, when there’s time, is the option that removes the risk almost entirely.
Step-by-Step: The Frozen-Breast Walkthrough
Here is how the scenario plays out from start to finish, with the reasoning at each stage.
Step 1 — Check the size and shape of what you’re working with. Run your hand over the frozen breasts. If they’re a single fused block thicker than about an inch and a half, treat them as too large to cook from frozen safely and thaw them first. If they’re individually frozen and thin, proceed. This check is the single most important decision point in the whole process, and it happens before the cooker is even plugged in.
Step 2 — Preheat the cooker and its liquid. Add your cooking liquid — broth, canned tomatoes, a sauce — to the insert and turn the cooker to high with the lid on for 15 to 20 minutes before the chicken goes in. This is a step most frozen-chicken advice skips, and it matters: a preheated pot means the chicken lands in an environment that’s already climbing toward a safe temperature instead of starting cold alongside it.
Step 3 — Add the chicken in a single layer, separated. If the breasts are frozen together, don’t force them apart with a knife; let them sit in the warm liquid for a few minutes until they release, then separate them. Lay them flat so as much surface as possible contacts the hot liquid. Stacking frozen pieces on top of each other recreates the same cold-core problem you’re trying to avoid.
Step 4 — Keep the lid on and resist opening it. Every time the lid comes off, the cooker loses heat and the warm-up clock resets. On a frozen-chicken cook, that lost heat is exactly what you can’t afford. Set a timer and leave it alone.
Step 5 — Start checking with a thermometer earlier than the recipe says. For thin frozen breasts on high, begin checking around the 2.5-hour mark rather than waiting for a full 4 to 6 hours. The target is 165°F at the thickest part. A instant-read thermometer is the only reliable way to know — visual cues like color and firmness are misleading with chicken that started frozen.
Step 6 — Pull the chicken as soon as it hits temperature. Shred or slice it, then return it to the sauce if the recipe calls for that. Leaving it in the cooker past 165°F is how lean breast meat goes from tender to chalky.
What to Watch, Smell, and Feel For
Sensory cues help here, but only as a supplement to the thermometer. A properly cooking frozen-chicken dish will start to smell savory and faintly acidic (from tomatoes or broth) within the first hour, and the liquid will move from still to gently bubbling at the edges. If the pot smells raw or flat after two hours on high, the contents aren’t heating as expected — check that the cooker is on high and that the insert is seated properly.
Texture tells you a lot at the end. Shredded chicken that pulls apart into clean strands is done and safe. Chicken that resists shredding and feels rubbery in the center is underdone regardless of what the timer says. And chicken that crumbles into dry fibers has gone too far — the fix next time is to check earlier and pull sooner.
The Beginner Failure to Expect (and How to Fix It)
The classic first-attempt failure with frozen chicken is a breast that looks cooked on the outside but is still cool and pink at the core when you cut into it. This happens when the pieces were too thick, stacked, or the cooker was set to low. The fix is not to keep cooking and hope — it’s to check with a thermometer, and if the center is below 165°F, continue cooking on high and recheck every 15 minutes.
The second common failure is the opposite: dry, stringy chicken because it sat in the pot an hour past doneness. The fix is to set a timer for the earliest plausible doneness point and check there, not at the end of the recipe’s stated range.
When Thawing First Is Simply the Better Choice
For anyone cooking chicken regularly, the honest recommendation is to thaw first whenever the schedule allows. A breast thawed overnight in the refrigerator cooks evenly, reaches temperature predictably, and doesn’t force the texture-versus-safety trade-off that frozen cooking does. The frozen-to-slow-cooker method earns its place for thin cutlets and unplanned evenings, but it isn’t the method to build a routine around.
If you’re planning ahead, the refrigerator-thaw is the low-effort default: move the chicken from freezer to fridge the night before, and it’s ready by morning. For same-day thawing, a sealed bag under cold running water works faster than the fridge but needs more attention. Both beat the frozen-to-pot gamble on both safety and texture.
A Final Checklist Before You Start
- Confirm the breasts are thin or individually frozen — thick fused blocks should be thawed first.
- Preheat the cooker and liquid on high for 15 to 20 minutes.
- Lay the chicken in a single layer, not stacked.
- Keep the lid on and set a timer.
- Check with a thermometer starting earlier than the recipe suggests, targeting 165°F.
- Pull the chicken as soon as it reaches temperature.
The slow cooker is a patient appliance, but patience isn’t the same as safety. Treating frozen chicken as a special case — with its own rules about heat, size, and timing — is what keeps the convenience without the risk.
What’s the frozen-chicken dish you’re trying to make, and how thick are the pieces? Describe them, and the timing can be adjusted to match.