Say you are trying to get a pot roast dinner on the table where the carrots are tender but not mushy, the potatoes are cooked through, and the meat pulls apart easily — and instead you end up with carrots still faintly crunchy at the center while the potatoes on the bottom have gone soft and waterlogged. The meat is fine. Everything else is a mismatch. Before you blame the recipe or the appliance, it’s worth looking at how the ingredients were arranged before the lid ever went on, because layering order is doing more work in that outcome than most people assume.
A slow cooker doesn’t cook everything at the same rate no matter where it sits inside the pot. Heat enters from the bottom and sides, rises unevenly, and interacts differently with dense root vegetables than it does with meat or delicate greens. Layering isn’t a matter of tidiness — it’s a way of controlling which ingredients get the most direct, sustained heat and which get shielded from it. Here’s a process for thinking through layering before you start loading the insert.
Step 1: Identify Where the Heat Actually Comes From
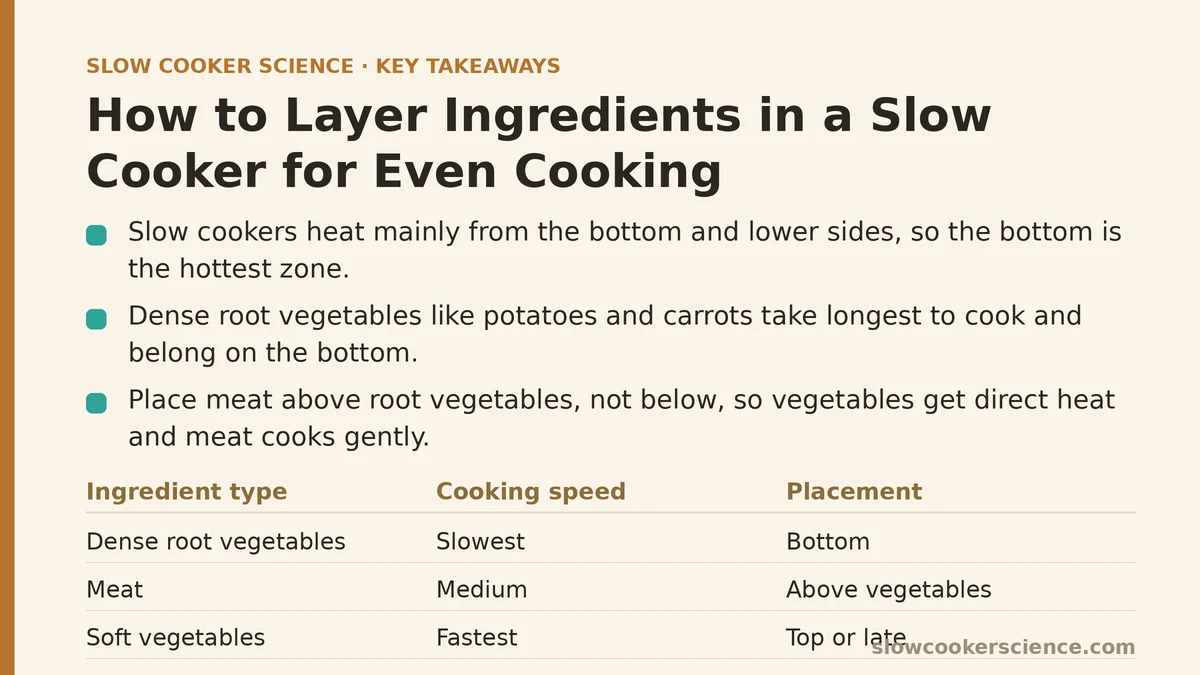
Most slow cookers heat primarily from the base and lower sides, with the heating element wrapped around the outside of the crock rather than underneath a separate heating plate in the center. That means the bottom and edges of the insert are the hottest zones for most of the cooking time, while the center and top cook more gently, insulated by whatever surrounds them.
This matters because it flips a common assumption. A lot of home cooks put meat on the bottom out of habit, treating it as the “main” ingredient that deserves the prime position. But meat generally tolerates direct, sustained heat reasonably well, especially the tougher cuts this appliance is built for. Root vegetables, by contrast, take longer to soften and often need that direct heat more than the protein does.
Step 2: Sort Your Ingredients by How Long They Take to Cook
Before you think about the insert at all, group your ingredients into rough cooking-time categories. Dense root vegetables — potatoes, carrots, turnips, parsnips — take the longest. Meat falls somewhere in the middle, depending on the cut. Softer vegetables like zucchini, bell peppers, or leafy greens cook fastest and can turn to mush if they spend the full session in direct contact with heat.
This sorting step is the actual foundation of good layering. Once you know which ingredients are slowest and which are fastest, the placement decision in the next step becomes far more straightforward than guessing based on what “seems” like it should go where.
Step 3: Put the Slowest-Cooking Vegetables on the Bottom
Dense root vegetables belong at the bottom of the insert, in direct contact with the hottest part of the crock. Cut them into even, moderately sized pieces — too large and they won’t finish in time even in this favorable position, too small and they’ll turn to mush before the rest of the dish is ready.
This is the step most often skipped, and it’s the one responsible for that classic complaint of undercooked potatoes in an otherwise finished dish. Giving root vegetables the most direct heat exposure and the longest effective cooking time compensates for how slowly they break down compared to nearly everything else you’ll add.
Step 4: Place the Meat Above the Root Vegetables, Not Below Them
Once the dense vegetables are down, the meat goes on top of them rather than underneath. This does two things at once. It shields the vegetables slightly less than you might expect, since heat still reaches them directly through the bottom of the pot, but it also means the meat isn’t sitting in the hottest zone for the entire cooking time, which helps prevent the exterior from overcooking before the interior catches up.
There’s a practical bonus here too: meat resting above vegetables tends to baste them somewhat as juices render downward, which can improve both flavor and moisture distribution in the lower layers.
Step 5: Layer Faster-Cooking Vegetables Near the Top
Anything that cooks quickly and turns to mush under prolonged heat — zucchini, mushrooms, soft squash, delicate greens — goes near the top of the pot, above the meat. This position benefits from the more moderate, indirect heat found in the upper portion of the insert, where these ingredients get enough exposure to cook through without disintegrating hours before the rest of the dish finishes.
For particularly fragile additions like fresh herbs or leafy greens, consider holding them out entirely and stirring them in during the last 20 to 30 minutes instead. Layering solves a lot of timing mismatches, but it has limits, and some ingredients are better handled with a late addition than with placement alone.
Step 6: Add Liquid Around the Sides, Not Poured Directly Over Everything
How you add liquid affects layering too. Pouring it straight down the center can wash seasoning off the top layer and disturb the arrangement you just built. Adding it gradually around the edges of the insert instead lets it settle into the bottom layer, where the root vegetables are sitting, without displacing everything above.
Keep in mind that slow cookers lose very little liquid to evaporation, since the lid creates a fairly sealed environment throughout cooking. You generally need less liquid than a stovetop or oven version of the same dish would call for, and layering with that in mind — rather than assuming you need to fully submerge every ingredient — helps avoid an overly soupy result by the end.
Step 7: Account for Insert Shape When You Layer
A wide, shallow insert distributes ingredients across more surface area in contact with the heated sides, while a tall, narrow insert stacks things more vertically with a smaller footprint touching the hottest zones. In a shallow cooker, spread the root vegetables in a single, even layer if you can, since a thick pile in one corner will cook unevenly compared to vegetables spread more thinly across the base.
In a taller, narrower insert, layering order still follows the same logic — dense vegetables low, meat above, delicate additions high — but you may need to check doneness a bit earlier near the center of each layer, since heat takes longer to penetrate a deeper stack than a shallow, spread-out one.
Step 8: Recheck the Layering Logic for Dishes That Don’t Fit the Pattern
Not every slow cooker dish follows a meat-and-vegetables structure, and the layering principles above bend for dishes that don’t fit that mold. Soups and stews where everything simmers in a shared liquid depend less on strict layering, since the ingredients are moving somewhat within the broth throughout cooking anyway. Grain-based dishes, like rice or oats, often need to sit closer to the bottom or in a separate insert dish entirely, since they can scorch if left too long in direct contact with concentrated heat without enough surrounding liquid.
If a recipe doesn’t clearly map onto “dense vegetables, then protein, then delicate additions,” it’s worth pausing and asking what’s actually driving the texture or timing risk in that specific dish, rather than forcing a layering pattern built for pot roast onto something that doesn’t share its structure.
Putting It Together: A Worked Example
Take a chicken and root vegetable dish with potatoes, carrots, bone-in chicken thighs, and a handful of green beans added toward the end. Potatoes and carrots, cut into roughly one-and-a-half-inch pieces, go down first, spread evenly across the bottom. Chicken thighs sit on top of the vegetables, skin removed if you’re managing rendered fat, arranged in a single layer where possible rather than stacked. Liquid gets poured gently around the edges rather than over the chicken directly, keeping any seasoning in place. Green beans are held back and stirred in during the final 20 to 30 minutes, once the potatoes and carrots are nearly done and the chicken has finished cooking through.
The result is a dish where every component finishes close to its own ideal point rather than compromising toward some average timing that suits none of them particularly well.
Layering won’t fix a recipe with fundamentally mismatched ingredients or wildly off cooking times, but for most everyday slow cooker meals, it solves a surprising share of the unevenness people chalk up to the appliance itself. Give the slowest ingredients the most direct heat, protect the fastest ones from it, and let the meat sit somewhere sensible in between.
What dish are you building, and which ingredient keeps finishing at the wrong time? Tell me what you’re layering and I can help you work out the order.
Related guides: How to Adapt Slow Cooker Recipes for Different Sized Appliances, Slow Cooker Chili Recipe Tips for Perfect Texture Every Time, and Slow Cooker Meal Planning: Batch Cooking for Busy Weeks.