The most common misconception about shredded chicken is that longer cooking always means more tender meat. In a slow cooker, the opposite is often true: past a certain point, chicken breasts and even thighs keep cooking well after they’ve hit their tender window, and the muscle fibers tighten and squeeze out moisture until the meat turns dry, chalky, and stubbornly stringy rather than falling apart under a fork. Fall-apart chicken isn’t the result of maximum cooking time — it’s the result of stopping at the right moment and using a few supporting details correctly along the way.
Below are the questions readers ask most about this process, answered in the order they tend to come up.
Which Cut of Chicken Should You Use?
This decision shapes everything downstream. There are three realistic options, and each behaves differently under long, moist heat:
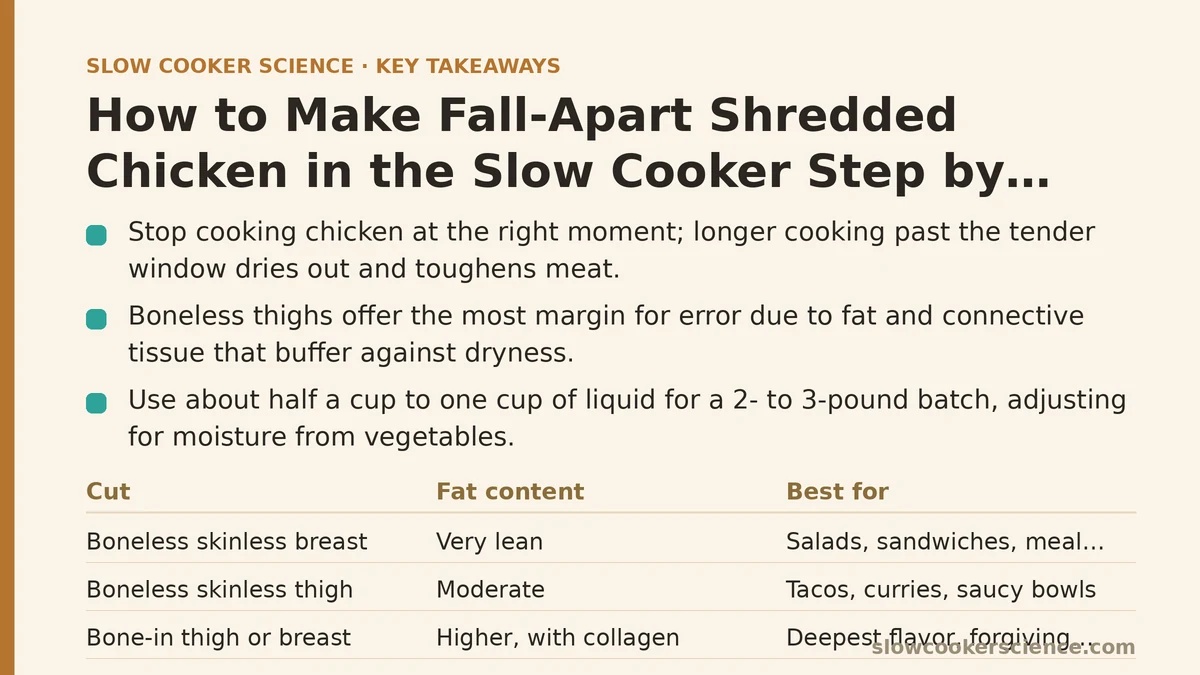
| Cut | Fat content | Best for | Watch out for |
|---|---|---|---|
| Boneless skinless breast | Very lean | Shredded chicken for salads, sandwiches, meal prep | Dries out fastest; smallest window between done and overcooked |
| Boneless skinless thigh | Moderate | Tacos, curries, saucy bowls, anything that benefits from richness | Slightly longer cook; can feel oily if you skip skimming |
| Bone-in thigh or breast | Higher, with collagen near the bone | Deepest flavor, most forgiving texture | Longer cook time; needs careful deboning before shredding |
For a first attempt, boneless thighs give you the most margin for error because their fat and connective tissue buffer against the dryness that lean breast meat suffers when timing slips. Breasts work well too, but they reward attention — a thermometer and a shorter cook matter far more with them.
If you’re cooking for a crowd or meal prepping, breasts are economical and shred into clean, uniform pieces. If texture matters more than cost, thighs consistently deliver a softer, more yielding shred.
Should You Sear the Chicken First?
Searing is optional, and whether it’s worth it depends on what you’re making. A quick sear in a hot pan before the chicken goes into the insert builds browning and a deeper flavor base, especially for dishes where the chicken is the star rather than a component in a sauce.
For a saucy dish — say, chicken destined for enchilada filling or a barbecue-style pile — the sauce carries most of the flavor, and skipping the sear saves a pan and fifteen minutes without a noticeable loss. For plain shredded chicken meant to stand on its own, a sear or a brief broil after shredding adds useful flavor.
A practical middle ground: skip the pre-sear, then spread the shredded meat on a sheet pan and broil it for a few minutes after cooking. This dries the surface slightly and gives you browned edges without the extra pan work up front.
How Much Liquid Goes In?
Enough to create steam, not enough to submerge the chicken. A slow cooker traps moisture, so you need far less liquid than a stovetop braise would call for. Roughly half a cup to one cup of liquid for a 2- to 3-pound batch is usually sufficient, depending on how much moisture the other ingredients release.
Vegetables like onions, tomatoes, and peppers shed water as they cook, which adds to the liquid in the pot. If your recipe includes several cups of fresh vegetables, start at the lower end of the liquid range. Conversely, a batch of plain chicken with only dry seasonings needs a bit more to get the steam cycle going.
The chicken should sit in the liquid, not swim in it. If the pieces are more than halfway covered, you’ve probably overdone it — excess liquid dilutes flavor and can leave the shredded result soggy.
What Temperature and Time Should You Use?
Low heat, and less time than most recipes suggest. As a starting point for boneless pieces:
- Boneless thighs: 3 to 4 hours on low, or 2 to 2.5 hours on high.
- Boneless breasts: 2.5 to 3.5 hours on low, or 1.5 to 2 hours on high.
- Bone-in pieces: add roughly an hour on low, and check with a thermometer.
These ranges are typical, not fixed — insert size, fill level, and the temperature quirks of individual appliances all shift the outcome. The single most reliable habit is to start checking early, around the low end of the range, rather than setting a timer for the maximum and walking away.
How Do You Know When It’s Done?
Two checks, and they should agree.
First, temperature: chicken is safe at 165°F (74°C) in the thickest part. For shredding, many cooks aim slightly higher — around 195°F to 205°F (90°C to 96°C) — because at that point the connective tissue has broken down enough that the meat pulls apart with almost no resistance. Breast meat reaches its tender point at the lower end of that range and turns dry quickly past it; thighs tolerate the higher end better.
Second, texture: press a piece with the back of a fork. If it resists and springs back, it needs more time. If it gives way and starts to separate into fibers, it’s ready. If it crumbles into dry shreds the moment you touch it, it’s gone too far — pull it out and add moisture back through sauce rather than more cooking.
A useful sensory cue: the aroma shifts from raw and sharp to a rounded, savory smell well before the meat is overcooked. Trust your nose as a rough signal to start checking.
How Should You Shred It?
Let the chicken rest in the insert, off the heat, for about ten minutes. This lets the juices redistribute and makes the meat easier to handle without burning your fingers.
Then choose your method:
- Two forks: the classic approach, pulling in opposite directions. Works well for small batches and gives you control over the shred size.
- Hand mixer or stand mixer with paddle: fast and uniform, but easy to over-process into a paste. Use the lowest setting and pulse in short bursts.
- Your hands (once cool enough): gives the most natural, varied texture, which many people prefer for tacos and sandwiches.
Shred in the pot with a ladleful of the cooking liquid nearby, adding a splash as you go if the meat starts to look dry. The liquid carries flavor and keeps the shreds from clumping.
Why Did the Chicken Turn Out Dry or Stringy?
This is the failure most beginners hit, and it almost always comes down to one of three causes:
- Overcooking. Chicken keeps tightening past its tender window. Lean breast meat is especially unforgiving — fifteen extra minutes can turn a tender batch chalky.
- Too little liquid. Without enough steam, the meat dries from the outside in before the center tenderizes.
- Shredding too aggressively. A hand mixer run too long pulverizes the fibers into a paste that reads as dry even when the meat is moist.
The fix for each is straightforward: start checking early and use a thermometer, add enough liquid to create steam without submerging, and shred gently with a fork or by hand for the best texture.
A fourth, less obvious cause is salting too early. A heavy salt dose at the start draws moisture out of the meat over a long cook, which is fine in small amounts but can firm up lean pieces if overdone. A modest salt at the start plus a taste-and-adjust pass at the end gives more control.
Can You Cook It From Frozen?
Technically yes, but with caveats worth knowing. Many appliance manufacturers advise against cooking from frozen because the outer layers of the meat spend too long in the temperature range where bacteria multiply fastest before the center thaws. If you cook from frozen, use a thermometer rather than a timer to confirm doneness, and add roughly 50 percent to the cooking time.
A safer habit is to thaw overnight in the refrigerator, then cook as normal. The texture is more consistent, and the timing is far easier to predict.
How Do You Store and Reheat Shredded Chicken?
Shredded chicken keeps in the refrigerator for about three to four days in a sealed container. Store it with a little of the cooking liquid to keep it from drying out.
For longer storage, freeze in portion-sized bags with the liquid, pressed flat for quick thawing, for up to two to three months. Reheat gently — a covered pan on low heat or a brief microwave burst with a splash of liquid — rather than blasting it, which dries the shreds out.
One useful trick: portion the chicken before shredding, then shred only what you’ll use now. Whole cooked pieces reheat better than pre-shredded meat, which loses moisture each time it’s warmed.
Putting It Into Practice
A simple worked sequence for a 2.5-pound batch of boneless thighs: place the thighs in the insert, add half a cup of broth, a few smashed garlic cloves, and a modest pinch of salt. Cook on low, and start checking at the 3-hour mark — press a piece with a fork and take its temperature. Once it pulls apart easily and reads around 195°F, turn off the appliance and let it rest for ten minutes. Shred with two forks, adding a ladleful of the cooking liquid as you go, then taste and adjust the salt.
That’s the whole method: choose the right cut, keep the liquid modest, cook less than you think you should, and let temperature and texture — not the clock — tell you when to stop. Fall-apart chicken is less about patience than about knowing the exact moment to pull it.
What are you making with your shredded chicken — tacos, a salad, a freezer stash? Tell me the dish and I can suggest seasoning and timing tweaks that suit it.
Related guides: Slow Cooker Mistakes That Cause Dry Chicken and How to Fix Them, Best Time to Add Herbs and Spices in Slow Cooking, and How to Layer Ingredients in a Slow Cooker for Even Cooking.