Say you are standing in the kitchen on a Sunday evening with a bag of chicken thighs, a few peppers, an onion, and a can of crushed tomatoes, and the plan is to assemble four dinners at once so that Wednesday doesn’t turn into takeout again. You dump everything into a zip-top bag, squeeze out the air, and slide it into the freezer, feeling efficient. Two weeks later you thaw that bag, tip it into the slow cooker, and discover the vegetables have gone grainy, the sauce is watery, and the chicken is stringy — not because you did anything dramatically wrong, but because freezer meal prep has its own rules, and nobody handed them to you.
That gap between “assemble bags and freeze them” and “assemble bags that come out of the freezer tasting like a real dinner” is what this guide is about. Below, the questions beginners ask most often, answered in the order you’d hit them.
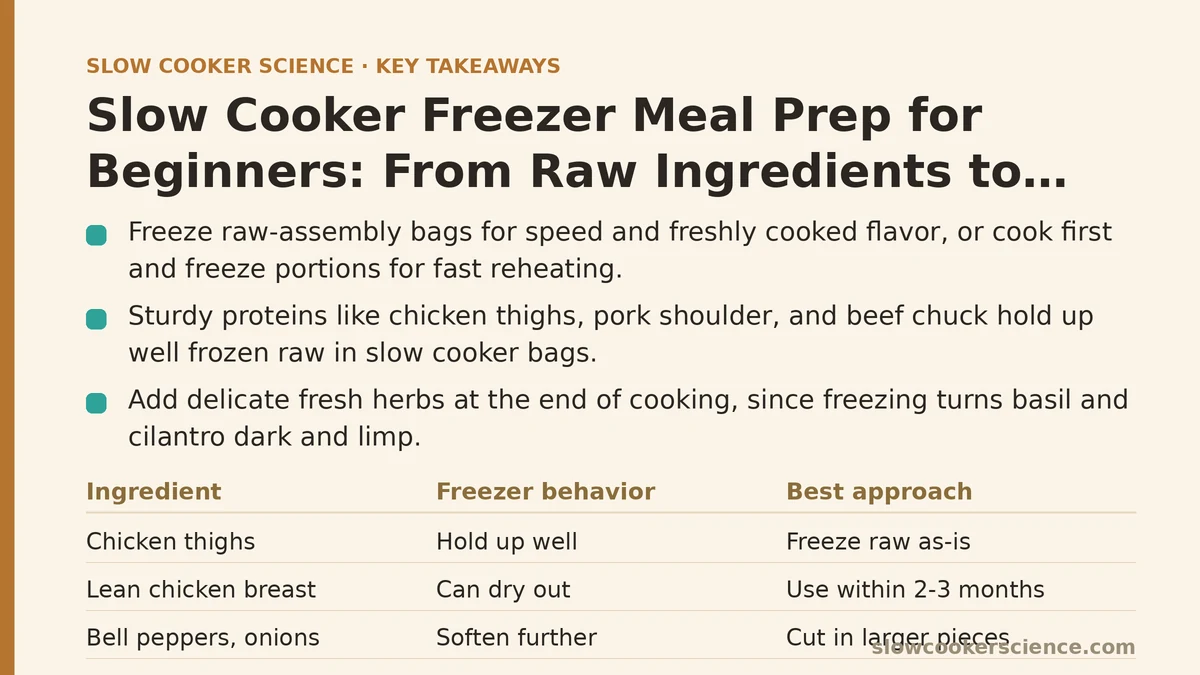
Which Foods Freeze Well in a Slow Cooker Bag, and Which Fall Apart?
Not every ingredient survives a freeze-thaw cycle with its texture intact. The freezer pulls water out of cell walls and forms ice crystals, and when those crystals melt, the structure they were holding together often goes with them. Ingredients with high water content and delicate cell walls notice this most.
Here’s a practical sorting table you can keep in mind while planning:
| Ingredient type | Freezer behavior | Best approach |
|---|---|---|
| Chicken thighs, pork shoulder, beef chuck | Hold up well; fat and connective tissue protect texture | Freeze raw in the bag as-is |
| Lean chicken breast | Can dry out over long freezer storage | Use within 2–3 months; add extra liquid |
| Root vegetables (carrots, potatoes, parsnips) | Potatoes can turn mealy; carrots stay firm | Cut potatoes larger; consider adding fresh instead |
| Bell peppers, onions | Soften further after freezing | Cut in larger pieces than you would fresh |
| Mushrooms | Release water and go spongy | Sauté first or accept a softer result |
| Tomatoes (canned or crushed) | Freeze well | Use freely as a base |
| Fresh delicate herbs (basil, cilantro) | Turn dark and limp | Add fresh at the end of cooking instead |
| Dried herbs and ground spices | Unaffected by freezing | Add directly to the bag |
The pattern underneath the table: sturdy proteins and canned bases are your friends, while anything you’d serve raw or crisp is better added later. When in doubt, err toward larger cuts — a chunk of carrot that starts big will still have some bite after freezing and eight hours of heat, while a thin slice will not.
Should You Freeze Raw or Cook the Meal First?
This is the first real fork in the road, and both paths work. They just suit different schedules and different dishes.
Raw-assembly bags are exactly what they sound like: everything goes into the bag uncooked, freezes solid, and cooks for the first time in the slow cooker on the day you use it. The appeal is speed — you can assemble six bags in under an hour — and the fact that the food tastes freshly cooked on serving day rather than twice-cooked. The catch is that raw meat and raw vegetables in the same bag need to thaw safely and cook through evenly, and the liquid ratios need a little more care.
Cook-then-freeze portions mean you make a full batch of chili, stew, or pulled pork, cool it properly, and freeze the finished dish in portions. Reheating is fast and forgiving, and the texture is already settled. The tradeoff is that you’ve spent the cooking time upfront, and some dishes — potatoes in soup, pasta — degrade on the second pass through heat.
For a beginner building a first rotation, a mix tends to work best: raw-assembly bags for things like chicken-and-salsa, beef-and-vegetable stew, and pork with apples; cooked-and-frozen portions for anything where the texture is fragile or the batch is large.
How Do You Assemble a Freezer Bag Without Making a Mess?
The assembly step is where most of the beginner frustration lives, and it’s almost entirely solvable with technique rather than special equipment.
- Label the bag before you fill it. A strip of masking tape or a freezer label on the outside, marked with the dish name, the date assembled, and the cooking instructions. Writing on a bag that’s already full of cold ingredients is miserable.
- Stand the bag up in a container. A large measuring jug, a stockpot, or a plastic storage tub holds the bag open so you can load it two-handed. This single trick prevents most spills.
- Add liquid last and leave headroom. Liquids expand as they freeze. Leave roughly an inch of space at the top of the bag, and squeeze out as much air as you can before sealing.
- Freeze bags flat. Lay each bag on a sheet pan and slide it into the freezer that way. Flat bags stack like books, thaw faster, and take up far less room than a lumpy upright bag.
- Keep a running inventory. A note on the freezer door or a phone list of what went in and when. Freezer meals are only convenient if you know what’s in there.
A useful habit: portion your meat by weight as you go rather than eyeballing it. Two pounds per bag for a family of four is a common working number, but the real anchor is whatever your slow cooker comfortably holds at two-thirds full.
What Should You Write on the Label?
Every bag needs four pieces of information, and skipping any one of them causes problems later.
- Dish name — obvious, but “chicken thing” at 6 p.m. on a Tuesday is not helpful.
- Date assembled — so you can rotate oldest-first and know when something has been in there too long.
- Cooking instructions — including whether it goes in frozen or thawed, how much liquid to add on the day, and the expected time on low and high.
- Any add-in notes — “stir in coconut milk at the end” or “top with fresh cilantro” saves you from a dish that comes out missing its finish.
The instruction line matters more than beginners expect. A bag that says “low 7 hours, add 1/2 cup broth before cooking” turns the slow cooker into a low-effort appliance. A bag with no instructions turns it back into a decision.
How Long Can Freezer Meals Stay Frozen?
Typical freezer storage guidelines, which reflect food-quality decline rather than immediate safety failure:
| Meal type | Practical freezer window |
|---|---|
| Raw chicken or pork assembly bags | 2–3 months |
| Raw beef assembly bags | 3–4 months |
| Cooked stews, chilis, braises | 2–3 months |
| Soups (without potatoes or pasta) | 2–3 months |
| Cooked rice or grains, portioned | 1 month |
Food frozen at 0°F (-18°C) stays safe indefinitely in a technical sense, but quality — flavor, texture, fat rendering — degrades over time. The windows above are the point where most cooks notice the difference. Label dates exist so you can stay inside them without guesswork.
How Do You Thaw a Freezer Bag Safely?
This is the step where food-safety basics matter most, and it’s worth stating plainly.
- Best method: move the bag to the refrigerator the night before and let it thaw slowly, set on a plate to catch drips. A flat bag thaws in about 12–24 hours in a fridge.
- Acceptable method: submerge the sealed bag in cold water and change the water every 30 minutes. Never use hot water, which can bring the outer surface into the temperature danger zone while the center stays frozen.
- Shortcut method: many slow cooker recipes allow cooking from frozen. This is safe if the recipe is designed for it and the appliance reaches a safe temperature quickly — but it lengthens cooking time considerably and can leave large cuts undercooked in the center. Check with a thermometer rather than trusting the clock.
Never thaw raw meat on the counter. The outer layer sits in the danger zone for hours while the center is still solid, and that’s the scenario food-safety guidance exists to prevent.
How Do You Reheat and Finish the Dish So It Doesn’t Taste Like Leftovers?
Two different situations here, and they need different handling.
For raw-assembly bags cooked fresh in the slow cooker: tip the thawed contents into the insert, add any liquid the label calls for, and cook per the instructions. Because the food is cooking for the first time, it tastes like a freshly made meal — this is the biggest advantage of the raw-assembly approach. The one adjustment worth making is to check seasoning near the end, since freezing can mute spice intensity slightly.
For cooked-and-frozen portions: reheat gently, either in the slow cooker on low for 2–3 hours (stirring once or twice), on the stovetop over medium-low, or in the microwave in short bursts. Reheated braises and chilis typically need a splash of broth or a squeeze of citrus to wake them back up — the flavors flatten in the freezer, and a small fresh addition restores the top notes.
For either path, the sensory test is the same: the dish should smell like the version you made fresh, the meat should pull apart with a fork, and the sauce should coat a spoon rather than run off it. If it tastes flat, add salt, acid, or a fresh herb before serving rather than during.
What Are the Most Common Beginner Mistakes, and How Do You Fix Them?
A short list of things that go wrong, with the fix attached:
- Too much liquid in the bag. The freezer doesn’t reduce liquid, and neither does a slow cooker. Use about three-quarters of the liquid you’d use for a stovetop version, then adjust at the end.
- Potatoes turning grainy. Potatoes freeze poorly in raw form. Either cut them in large chunks, par-cook them first, or leave them out of the bag and add fresh on cooking day.
- Bags leaking in the freezer. Usually from overfilling or a weak seal. Double-bag anything with a lot of liquid, or freeze flat on a sheet pan first so the bag firms up before it’s moved.
- Everything tasting the same. Batch-cooking the same base four times gets old fast. Vary the finish — one bag gets cumin and lime, one gets smoked paprika and honey, one gets Italian herbs — while keeping the assembly method identical.
- Forgetting what’s in the freezer. The inventory note solves this. So does the label.
The general principle across all five: freezer meal prep rewards boring consistency in assembly and small variation in flavor, not the other way around.
Putting It Together: A First Rotation
A workable starter set for someone building their first freezer rotation, all assembled in one sitting:
- Chicken and salsa bags — chicken thighs, jarred salsa, onion, cumin. Cook low 6–7 hours, shred, serve over rice.
- Beef and root vegetable stew — chuck cubes, carrots, onion, crushed tomatoes, beef broth, dried thyme. Cook low 8 hours.
- Pork with apples and mustard — pork shoulder, sliced apples, whole-grain mustard, a splash of cider. Cook low 7–8 hours, finish with fresh thyme.
- Vegetarian chickpea and tomato stew — chickpeas, crushed tomatoes, onion, garlic, smoked paprika, spinach added at the end. Cook low 6 hours.
Assemble each in a labeled bag, freeze flat, and note the cooking instructions on the label. Four dinners, one round of dishes, and a Wednesday that doesn’t end in a delivery app.
Which of these dishes are you planning to try first, and what’s in your freezer right now that you’re not sure what to do with? Describe it, and it’s usually possible to work out whether it’s a candidate for a freezer bag or better cooked fresh.
Related guides: Best Time to Add Herbs and Spices in Slow Cooking, How to Adapt Slow Cooker Recipes for Different Sized Appliances, and How to Layer Ingredients in a Slow Cooker for Even Cooking.