The most common way a beginner ruins a pot roast is not undercooking it. It’s pulling the meat out too early because it looks done, then carving it into dry, chewy slabs that shred into strings instead of slicing cleanly. The second most common way is the opposite mistake: cooking it so long that the meat collapses into mush and the vegetables turn to paste. Both failures come from the same blind spot — treating “tender” as a fixed time on a dial rather than a physical state you have to check for.
What follows walks a single pot roast from the grocery store to the table, using one concrete example — a 3-pound chuck roast in a 6-quart slow cooker — and folding the general technique into that walkthrough. By the end, you’ll have a repeatable sequence and the sensory cues that tell you when to stop cooking, regardless of what the recipe says.

Choosing the Cut Before Anything Else
Not every beef roast behaves the same way in a slow cooker, and the wrong cut will fight you the whole time. The rule that matters most: the cuts that turn silky under long, moist heat are the ones with plenty of connective tissue — collagen woven through the muscle — not the lean, expensive ones.
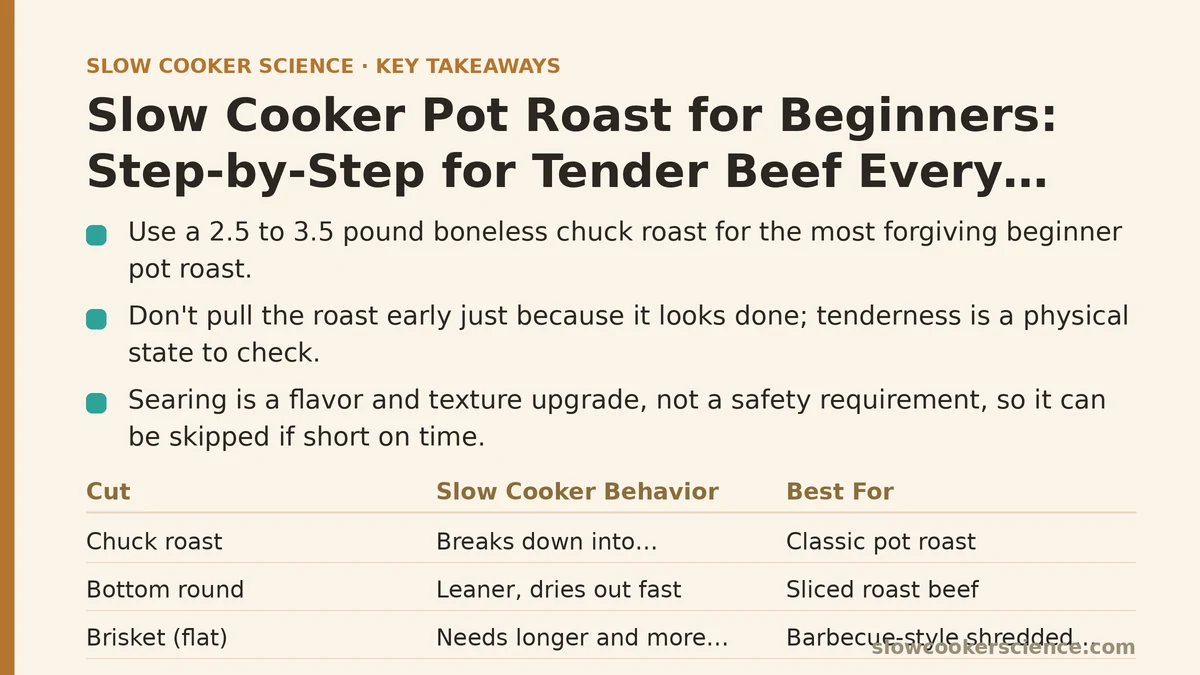
| Cut | What it does in a slow cooker | Best for |
|---|---|---|
| Chuck roast | Breaks down into shreddable, rich-tasting beef; forgiving of a wide time window | Classic pot roast, shredded beef |
| Bottom round | Leaner, slices neatly if not overcooked, but dries out fast past target temp | Sliced roast beef, sandwiches |
| Brisket (flat) | Firm structure, needs longer and more liquid; can be stringy if rushed | Barbecue-style shredded beef |
| Sirloin tip | Tender but lean; overcooks quickly and turns mealy | Faster cooks, not 8-hour roasts |
For a beginner’s first pot roast, a boneless chuck roast in the 2.5 to 3.5 pound range is the most forgiving choice. Look for a piece with visible marbling and clear seams of white connective tissue running through it. That connective tissue is the entire point — it’s what melts into gelatin during the cook and gives you the silky texture people mean when they say a roast is tender.
If the roast is tied with butcher’s twine, you can leave it on during cooking and snip it off before carving. If it’s an uneven thickness, some cooks trim the thinner end or fold it under so the whole piece cooks more evenly. Neither step is mandatory for a first attempt.
The Sear Question, Answered Honestly
Searing the roast before it goes in the slow cooker is the single most debated step in pot roast recipes, and the honest answer is that it’s a texture-and-flavor upgrade, not a safety requirement.
A hard sear in a hot skillet builds browning on the surface — the maillard reaction — that adds a deeper, more roasted flavor to the finished gravy and gives the meat a slightly firmer crust that holds up better during the long cook. Without a sear, the roast still cooks through and still becomes tender, but the resulting sauce tends to taste flatter and the meat surface softer.
For a beginner, here’s a practical middle ground:
- Sear it if you have ten spare minutes and a skillet that can get properly hot. Pat the roast dry first — a wet surface steams instead of browning, and the hiss you’re listening for when it hits the pan won’t happen.
- Skip it if you’re short on time or cooking in a small kitchen. The roast will still be good; it just won’t have the same depth.
- Either way, season the roast generously with salt and pepper right before it goes in the pot.
The sear isn’t about sealing in juices — that’s a myth. Juices stay in because the meat is cooked gently in a covered, moist environment, not because a hot pan locked them inside.
Building the Pot: What Goes In and in What Order
With the roast seasoned (and optionally seared), it’s time to assemble. The order matters less than the ratios, but the ratios are where beginners go wrong most often.
Liquid level. A common mistake is submerging the roast in broth as if making soup. You want the liquid to come roughly a third to halfway up the side of the roast, not cover it. Too much liquid dilutes the flavor and turns the dish watery; too little and the bottom scorches. For a 3-pound roast in a 6-quart cooker, about 1 to 1.5 cups of liquid is a reasonable starting point.
What kind of liquid. Broth or stock is the standard. A splash of something acidic — a tablespoon of Worcestershire, a quarter cup of red wine, or a tablespoon of tomato paste — brightens the finished sauce. Skip the wine if you’re not sure how it’ll play with the rest of the seasoning; it’s optional.
Aromatics and vegetables. Onion, garlic, and a few carrots and potatoes go in around and under the roast. Cut the vegetables into large, uniform chunks — at least 1.5 inches — because smaller pieces dissolve into mush over eight hours. A bay leaf and a sprig of thyme can go in loose; fish them out before serving.
A note on salt and timing. Salt added at the very start draws moisture out of the meat over a long cook, which is mostly fine for a braise but can make very lean cuts firmer than you’d like. A modest amount of salt at the start, plus a taste-and-adjust pass near the end, gives you more control than committing all your salt upfront.
Food-safety basics. Keep raw beef refrigerated until it’s ready to go in, wash anything that touched raw meat before it touches other food, and refrigerate leftovers within two hours of finishing the cook. Reheat leftovers to steaming hot before eating.
Setting the Cooker and Reading the Doneness Cues
Set the cooker to low and let it run. For a 3-pound chuck roast in a 6-quart cooker, a reasonable starting window is 7 to 8 hours on low, or 4 to 5 hours on high. But treat those numbers as a starting point, not a rule — the physical state of the meat is what decides when it’s done.
Here’s what to look and feel for at each stage:
- Around the 4-hour mark on low: The meat is cooked through but likely still firm when poked with a fork. The connective tissue hasn’t broken down yet. This is when beginners often panic and pull it too early.
- Around 6 hours: The roast will resist a fork but start to give slightly at the edges. The liquid should be simmering gently, not boiling hard. If it’s boiling, your cooker runs hot — dial back the time and check often.
- At the target time: Insert a fork into the thickest part and twist gently. If it slides in with light pressure and the meat separates into soft flakes, it’s ready. If it still feels springy or the fork meets resistance in the center, give it another 45 minutes and check again.
That twist test — fork in, twist, feel for the give — is the sensory cue that matters more than any timer. The meat should feel like it wants to fall apart under gentle pressure, not like it’s holding itself together.
If you’re not sure whether it’s done, it’s usually safer to go another 30 to 45 minutes on low than to pull it early. Chuck roast has a wide forgiving window; the danger zone is undershooting, not overshooting by a bit.
Resting, Slicing, and the Gravy Decision
Once the roast passes the fork test, lift it out of the cooker and let it rest on a cutting board for 10 to 15 minutes. Resting lets the juices redistribute so they don’t run out the moment you cut into it. Cover it loosely with foil while it rests.
While the roast rests, deal with the liquid in the pot. Two realistic options:
- Leave it as-is for a rustic, brothy sauce. Ladle it over the sliced meat and vegetables.
- Thicken it by whisking a tablespoon of cornstarch into a tablespoon of cold water, stirring that slurry into the hot liquid, and letting it bubble for a minute or two until it coats the back of a spoon. This is the move that turns the cooking liquid into the glossy gravy most people picture when they think of pot roast.
For slicing: cut the rested roast against the grain into thick slices, or let it fall apart into large shreds with two forks. Against the grain means cutting perpendicular to the visible muscle fibers — you’ll see them as striations running one direction across the meat. Cutting the other way shortens those fibers and makes every bite more tender.
If the vegetables look mushy at this point, that’s a sign they were cut too small or went in too early. Next time, cut them larger or add root vegetables in the last hour or two rather than from the start.
The Three Fixes Beginners Need Most
Most first-attempt pot roast problems trace back to one of three things. Here’s how to correct each:
- Meat is dry and stringy. Pulled before the connective tissue broke down. The fix is more time, not more liquid. Next attempt, plan for the full 7 to 8 hours on low and use the fork-twist test instead of a clock.
- Meat is mushy or falling apart in the wrong way. Cooked too long, or the cooker runs hotter than expected. Check your cooker’s actual low setting with a thermometer next time; some run near a simmer, not a gentle hold.
- Sauce is watery or flat. Too much liquid went in, or nothing was added for depth. Reduce the starting liquid to about a third of the roast’s height, and add a spoon of tomato paste or a dash of Worcestershire for a richer base.
What to Carry Forward
The technique generalizes well beyond beef. The same logic — pick a cut with connective tissue, keep liquid moderate, cook gently, and check texture rather than trusting the timer — applies to pork shoulder, lamb shanks, and most braised poultry. The specific numbers shift, but the physical cues don’t.
Your first pot roast will probably tell you more about your particular slow cooker than any recipe can, since appliances vary more than their capacity labels suggest. Take a note of how long it took, how much liquid remained, and how the meat felt at the moment you pulled it. That note is worth more than the recipe you started from.
Which cut are you planning to use, and what size is your slow cooker? List those two details and I can help you pin down a starting time and liquid amount for your first run.
Related guides: Best Time to Add Herbs and Spices in Slow Cooking, How to Adapt Slow Cooker Recipes for Different Sized Appliances, and Slow Cooker Mistakes That Cause Dry Chicken and How to Fix Them.