Say you are standing in the dairy aisle looking at a $7 tub of plain yogurt and thinking about the quart of milk already in your fridge, wondering whether your slow cooker — the same appliance that braises pork shoulder for eight hours — can be repurposed into a yogurt incubator overnight. The short answer is yes, with caveats, and the caveats matter more than the yes.
Yogurt is milk that has been held at a specific warm temperature long enough for bacteria to convert lactose into lactic acid. That’s the whole process. A slow cooker can hold that temperature, but it can also overshoot it, and overshooting is where most beginner batches go wrong — either scalding the culture or leaving the milk too cool for the bacteria to work at all. What follows is a step-by-step sequence that accounts for both failure modes.
Step 1: Understand What You’re Trying to Do
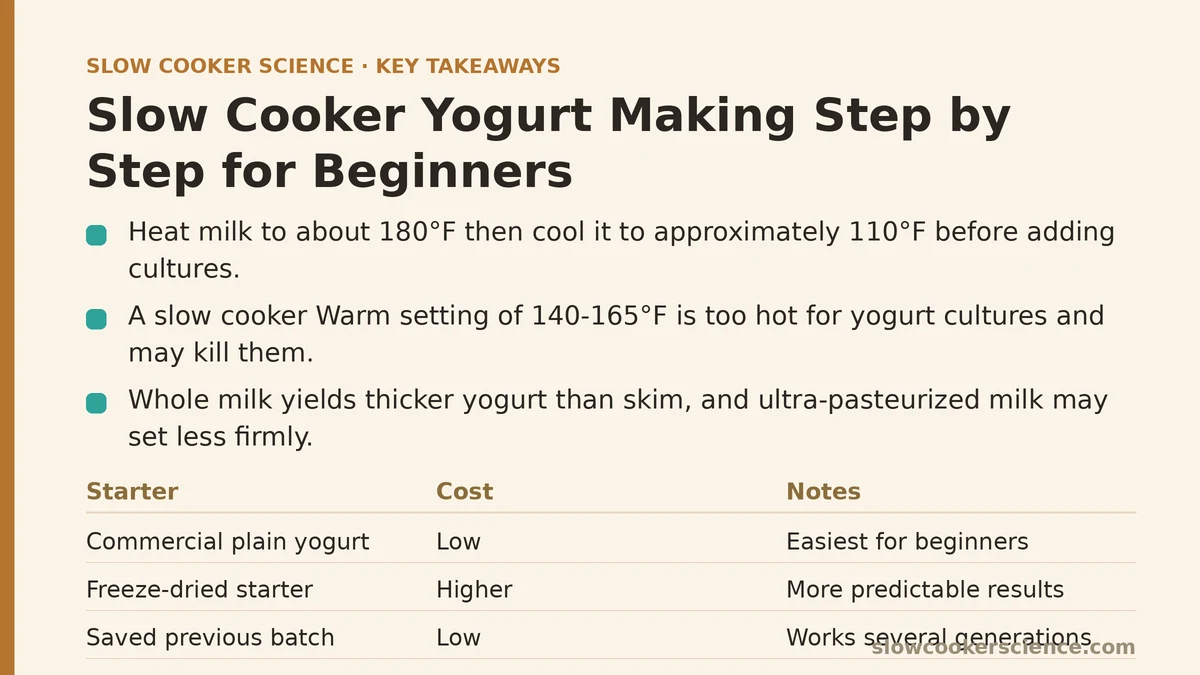
Two separate temperature targets govern this process, and confusing them is the most common source of a failed first batch. The first target is around 180°F (82°C), which the milk needs to reach briefly to denature its proteins so the final yogurt sets thick rather than runny. The second target is roughly 110°F (43°C), the range where the yogurt cultures — Lactobacillus bulgaricus and Streptococcus thermophilus, in most commercial starters — are active and can multiply.
A slow cooker on its Warm setting typically hovers somewhere between 140°F and 165°F depending on the model. That is far too hot for culturing and will kill your starter culture outright. So the appliance is not doing the incubating on its own — you are using its residual heat and, in most methods, an insulating wrap to hold the milk near 110°F for several hours. Understanding this distinction is what separates a working batch from a pot of warm, sour milk.
Step 2: Choose Your Milk and Your Starter
Whole milk produces the thickest, creamiest result because its fat content gives the yogurt body. 2% works reasonably well with a slightly looser set. Skim milk will culture fine but tends to produce a thin, almost drinkable yogurt unless you add a thickener or drain it afterward. Ultra-pasteurized milk is convenient and safe but can set less firmly than regular pasteurized milk, since the high-heat processing has already altered some of the proteins.
For the starter, you have three realistic options:
- A small cup of plain commercial yogurt with live and active cultures listed on the label. This is the easiest entry point. Avoid flavored, sweetened, or “lite” versions — sugar and artificial sweeteners can interfere with the culture.
- A freeze-dried yogurt starter packet, sold in most health-food sections. More predictable, more expensive per batch, and useful if you want a consistent result while learning.
- A few tablespoons saved from your previous batch. This is the long-term play, and it works well for several generations before the culture weakens and you need to reset with a fresh commercial starter.
If you are brand new, start with option one. It costs almost nothing and tells you whether the rest of your process is sound.
Step 3: Heat the Milk in the Slow Cooker
Pour your milk into the insert — a half-gallon is a comfortable batch size for a standard 6-quart cooker, filling it to roughly a third of capacity. Set the cooker to Low and cover it. Depending on your model, reaching 180°F takes somewhere between 2 and 3 hours.
Check the temperature with an instant-read thermometer rather than trusting the clock, because slow cooker low settings vary widely between brands and even between units of the same model. If your cooker runs hot, the milk may hit 180°F in 90 minutes. If it runs cool, you may need closer to 3 hours. Stir once or twice during heating to even out the temperature across the pot.
You are looking for a faint steaming surface and small bubbles beginning to form at the edges — not a rolling boil. If the milk does boil, it will not culture properly, and you should let it cool, skim off any skin, and start over with fresh milk. Boiled milk proteins coagulate and produce a grainy, separated yogurt.
Step 4: Cool the Milk to Culturing Temperature
Turn the cooker off and leave the lid off. The milk needs to drop from 180°F to roughly 110°F, which typically takes 45 minutes to an hour and a half at room temperature. This is the step where impatience costs you a batch — adding starter to milk that is still at 140°F will kill the bacteria and you will end up with nothing but sweet, warm milk that never sets.
To speed cooling, you can set the insert in a sink of cool water, stirring occasionally, which brings the temperature down in roughly 20 to 30 minutes. Check with your thermometer frequently. The target zone is 105°F to 115°F. If you overshoot and the milk drops below about 90°F, the culture will still work, but it will take considerably longer and may not set as firmly.
Step 5: Add the Starter and Stir Gently
Once the milk is in range, whisk a small amount of the warm milk into your starter in a separate cup to loosen it, then pour that mixture back into the insert and stir gently to distribute. Do not whisk vigorously — you are not trying to aerate the milk, and excessive agitation can introduce air pockets that disturb the set.
If you are using a freeze-dried packet, follow the ratio on the package; most call for one packet per quart to gallon of milk. If you are using commercial yogurt, roughly 2 tablespoons per quart works well. If you are using reserved yogurt from a previous batch, the same ratio applies, and you should not carry the same culture forward indefinitely — after four or five generations, the yogurt commonly starts to taste weak and set poorly, at which point you reset with a fresh commercial starter.
Step 6: Incubate — the Slow Cooker’s Real Job
Now you need to hold that inoculated milk near 110°F for 6 to 12 hours without letting it drift. There are three practical approaches, and each suits a different level of equipment and patience:
- Oven with the light on. If your oven has a light bulb that stays on with the door closed, this often maintains roughly 100–110°F. Simple, but you lose the oven for the duration and the temperature varies by oven.
- Slow cooker wrapped in towels. Turn the cooker off, cover the insert, wrap the whole thing in two or three bath towels, and leave it. Retains heat well for the first few hours, then gradually cools. Good for shorter incubation windows.
- Yogurt maker or sous-vide circulator. Purpose-built equipment that holds temperature steady. More reliable but a separate purchase. If you already own an immersion circulator, a water bath set to 110°F is one of the most consistent methods available.
Whichever route you take, check the temperature once or twice during incubation if you can do so without disturbing the pot too much. If it has dropped below 100°F after three or four hours, the culture has stalled and you will likely need to reheat gently and add a fresh starter — a frustrating but recoverable situation.
Step 7: Watch for the Set
Incubation time depends on temperature and how tart you like your yogurt. At a steady 110°F, mild yogurt is usually ready around 6 hours, and a tangier, thicker result comes at 8 to 10 hours. Beyond 12 hours, the yogurt typically becomes quite sour and can begin to separate, with whey pooling on the surface.
You can tell the batch has set when the surface is no longer liquid and the pot tilts with an almost custard-like wobble. Do not stir it at this stage. If you nudge the insert gently and the surface cracks rather than sloshes, you are done.
A beginner’s most common failure here is checking too often and stirring, which breaks the gel structure and produces a permanently runny yogurt. Leave it alone until you are seriously considering pulling it.
Step 8: Chill Before You Eat
The yogurt will not reach its final thickness until it has chilled. Transfer it to clean containers and refrigerate for at least 4 hours, ideally overnight. During chilling, the protein network continues to firm, and the flavor mellows slightly. Yogurt eaten straight from the warm pot tastes thinner and tarter than the same batch does the next morning.
Expect a little whey to separate on the surface during storage. This is normal and not a sign of spoilage. You can stir it back in, or pour it off if you want a thicker final product. Greek-style yogurt is made by straining regular yogurt through cheesecloth or a fine-mesh sieve for a few hours in the fridge to remove more whey — the same batch, just drained further.
Step 9: Troubleshoot What Went Wrong
A few of the common beginner outcomes, and what typically causes them:
| Result | Likely Cause | Fix for Next Batch |
|---|---|---|
| Thin, drinkable yogurt | Starter added too hot, or incubation too cool | Confirm milk is at 110°F before adding starter; insulate better |
| Grainy or curdled texture | Milk boiled, or culture overheated | Watch temperature during heating; pull off heat at 180°F |
| Very sour, separated | Incubated too long | Shorten to 6–8 hours and check for set earlier |
| No set at all | Dead starter, or milk too hot when inoculated | Use fresh starter and check the thermometer |
| Watery top layer | Normal whey separation | Stir back in or strain for Greek style |
Food safety note: the culturing process is not a sterilization step. Any bacteria present in your milk or on your equipment will also grow in the warm environment. Wash your insert, whisk, and containers with hot soapy water before starting, keep the milk covered during incubation, and refrigerate the finished yogurt promptly. If a finished batch smells or tastes clearly off — not just tart, but yeasty or spoiled — discard it rather than trying to salvage it.
Step 10: Build the Habit
The first batch takes most of a day of intermittent attention. The second takes less. By the third or fourth round, you will know roughly how long your cooker takes to reach 180°F, how quickly your kitchen cools the milk, and how many hours of incubation your household prefers. Those are the numbers that matter, and no chart substitutes for your own notes.
Keep a small record of each batch — milk type, starter used, time to heat, incubating hours, and how the final set turned out. Over a month, that log becomes more useful than any general recipe, because it reflects your specific appliance, your kitchen temperature, and your taste.
The first batch that quietly firms in the fridge overnight and comes out the next morning thick and mild is the one that turns this from a novelty into a routine. Give it two or three tries before deciding whether it fits your kitchen rhythm — the second attempt is usually dramatically better than the first, simply because you now know what to watch for.
Related guides: How to Add Dairy to a Slow Cooker Without Curdling: The Science, First-Time Slow Cooker Guide: Step-by-Step From Setup to First Meal, and Freezer-to-Slow-Cooker Meal Prep: A Beginner’s Step-by-Step Guide.